Preface
I’ve been working on a rendering engine in OpenGL. Over the past couple of months, I’ve built enough to warrant a post here, and so this page was born. The following content works through some (not so heavy) math, a bit of graphics theory, and a sprinkling of C++.
My very thanks to Prof. Amit Shesh for all his guidance on this project, and for providing me with the spark to learn graphics programming.
Premise
As a game developer who also loves playing video games, I’ve always worked on an abstraction layer, be it Unity or Unreal or any other application. I’ve never worked directly with the system level APIs and always wondered how these abstractions work. So when I had the chance to study computer graphics at Northeastern University, I pounced on the it. Over the course of 4 months, I built a small renderer, with support for hierarchial scenengraphs, and some sample scenes with dynamic transformations and so on and so forth. The experience was quite interesting, and left me longing for more. 1
And so began my journey of exploration, the ways in which devs have squeezed every last ounce of performance from a computer, how games run the way they do right now are nothing short of black magic.2 I’ve learnt of some of the smoke and mirrors that developers do to mask performance constraints , and how skillfully they blend it with gameplay so the player is never aware of the same. 3
Goals
The original scope of the project was to build a simple software renderer, with support for:
- Physically Based Rendering
- Shadow Volumes
- Importance sampling for image based lighting 4
But, as I’ve explored further and further, I’ve decided to stray a bit from my original goal, and build something that resembles a rendering engine. This means:
- Ability to load and save scenes (text files that save hierarchial scenegraphs)
- GUI View to build complex scenes (Dear ImGUI) 5
- Performance uplifts using clustered forward rendering (Referenced from google filament) 6
- Anti-Aliasing, HDR, Bloom and Tonemapping.
(This is not an exhaustive list, just something that I’ve planned for now.)
Shadow Volumes
The current industry standard in rendering shadows are shadow maps. Think of shadow maps as keeping the camera at the light source, then taking a “snap” of the scene from that view, then using that data to render shadows. This, alongwith the numerous improvements over the years, has become the go-to method of rendering shadows. However, it suffers from the fact that the shadows themselves are resolution dependent. This lead me to shadow volumes. 7
Shadow volumes can be thought of as extrusions of the shadows themselves into the 3d world, and then using a “stencil buffer”, we calculate the number of times a ray from the camera passes through such shadow volumes before reaching the object. We do so by incrementing the count everytime the ray passes into a front-facing shadow volume, and decrementing the count when the ray exits a back-facing shadow volume. If the final value is 0 when the object is reached, the object is in light, else it is in shadow otherwise.
The advantage of the shadow volume method is that the shadows produced by the method are resolution independent, but on the other hand, it has a fatal flaw: if the models are not watertight, there are leakages of shadows into the scene.
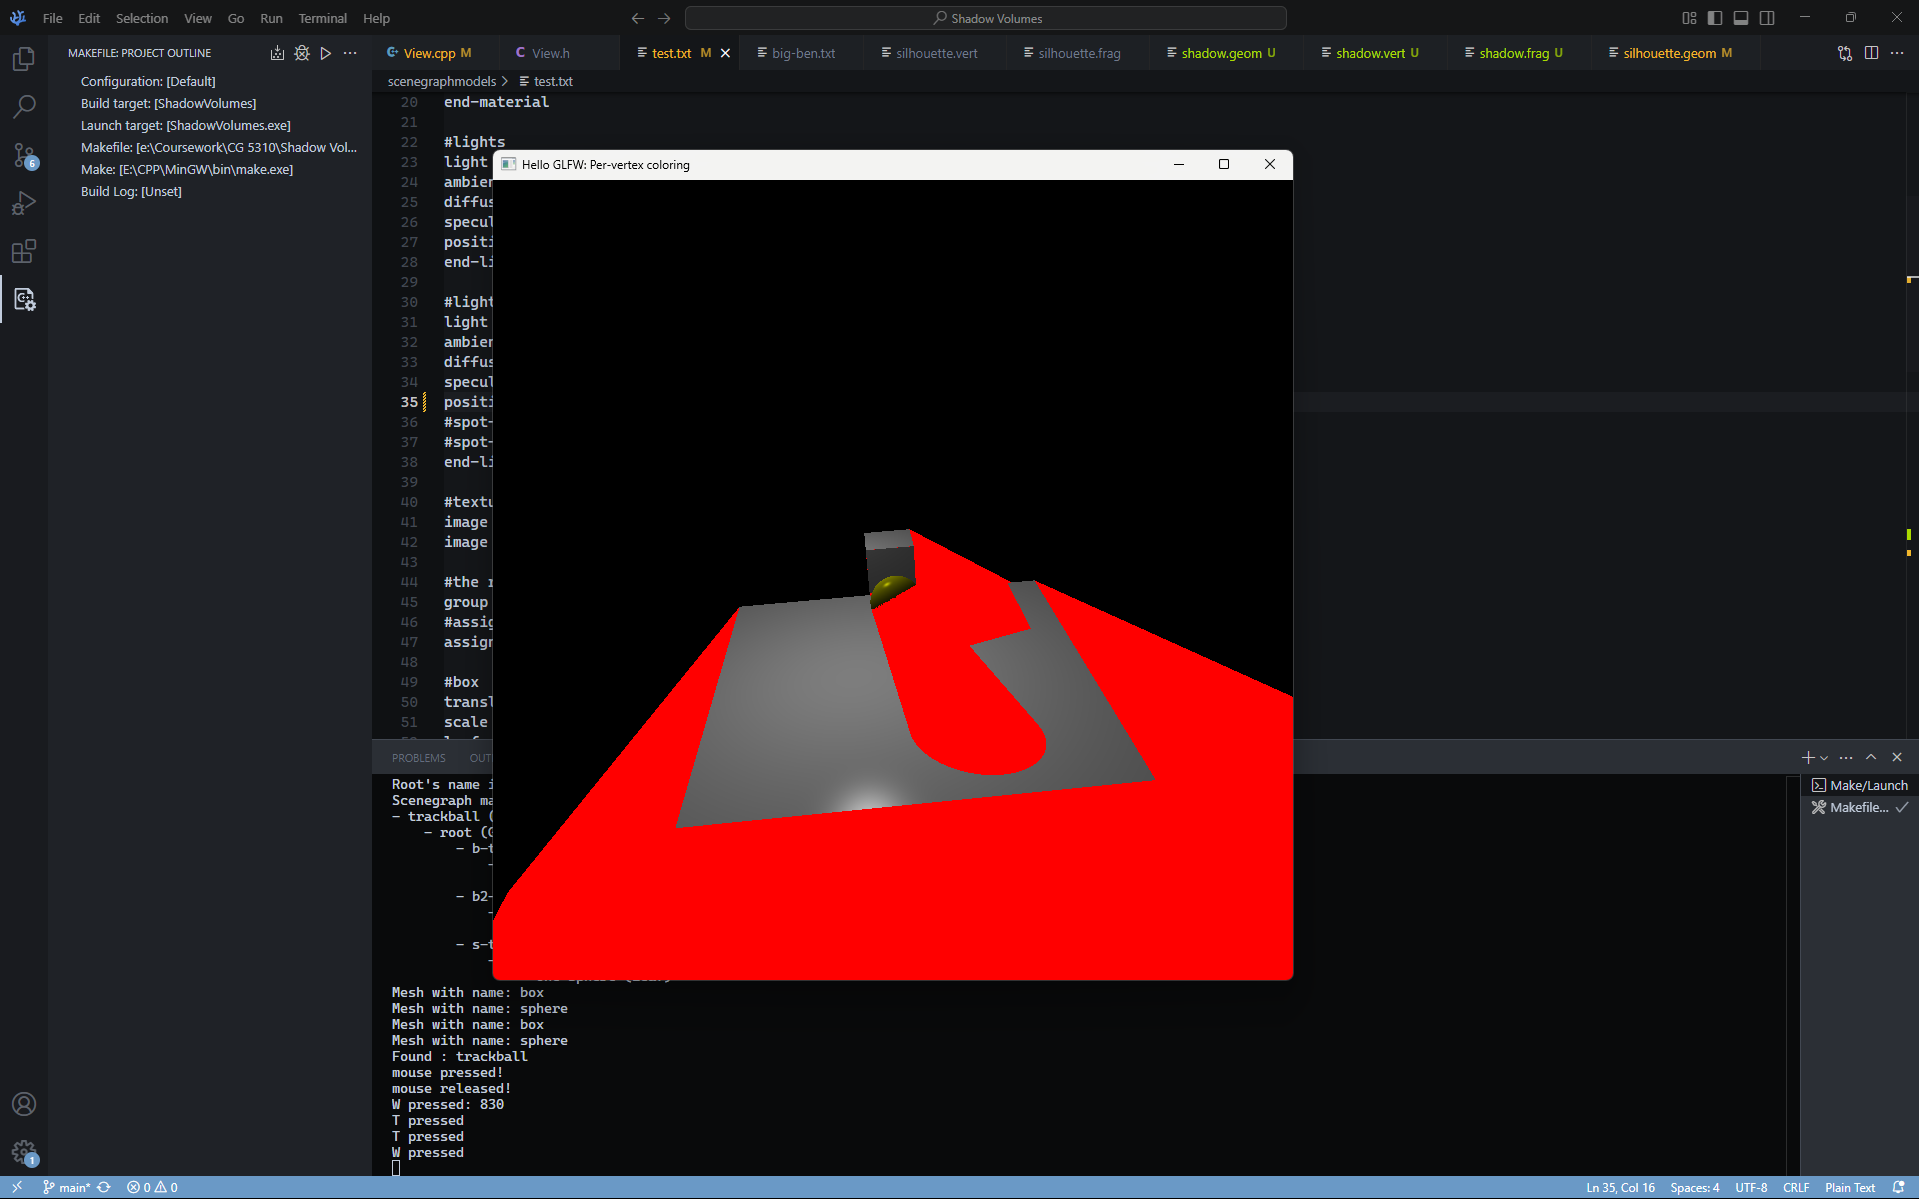 (A sample scene where the shadow volumes are rendered and visualized.)
The shadow volume technique involves multiple “passes”, where each pass does something to the final color of the pixel. The pseudocode is as follows:
DepthPass() // Build the depth buffer
glEnable(GL_STENCIL_TEST);   // enable stencil test.
glEnable(GL_BLEND);          // for multiple lights
glBlendFunc(GL_ONE, GL_ONE); //  Equally blend all the effects from all the lights

for(loop through each light)
{
    glClear(GL_STENCIL_BUFFER_BIT);
    shadowStencilPass(); // render the shadow volume into the stencil buffer.
    renderObjectPass();  // render all the objects with lighting (except ambient) into the scene. (fragments that fail the stencil test will not touch the fragment shader).
}

glDisable(GL_STENCIL_TEST);       // need to disable the stencil test for the ambient pass because all objects require ambient lighting.
ambientPass(scenegraph, viewMat); // ambient pass for all objects.
The result of such a program is as follows:
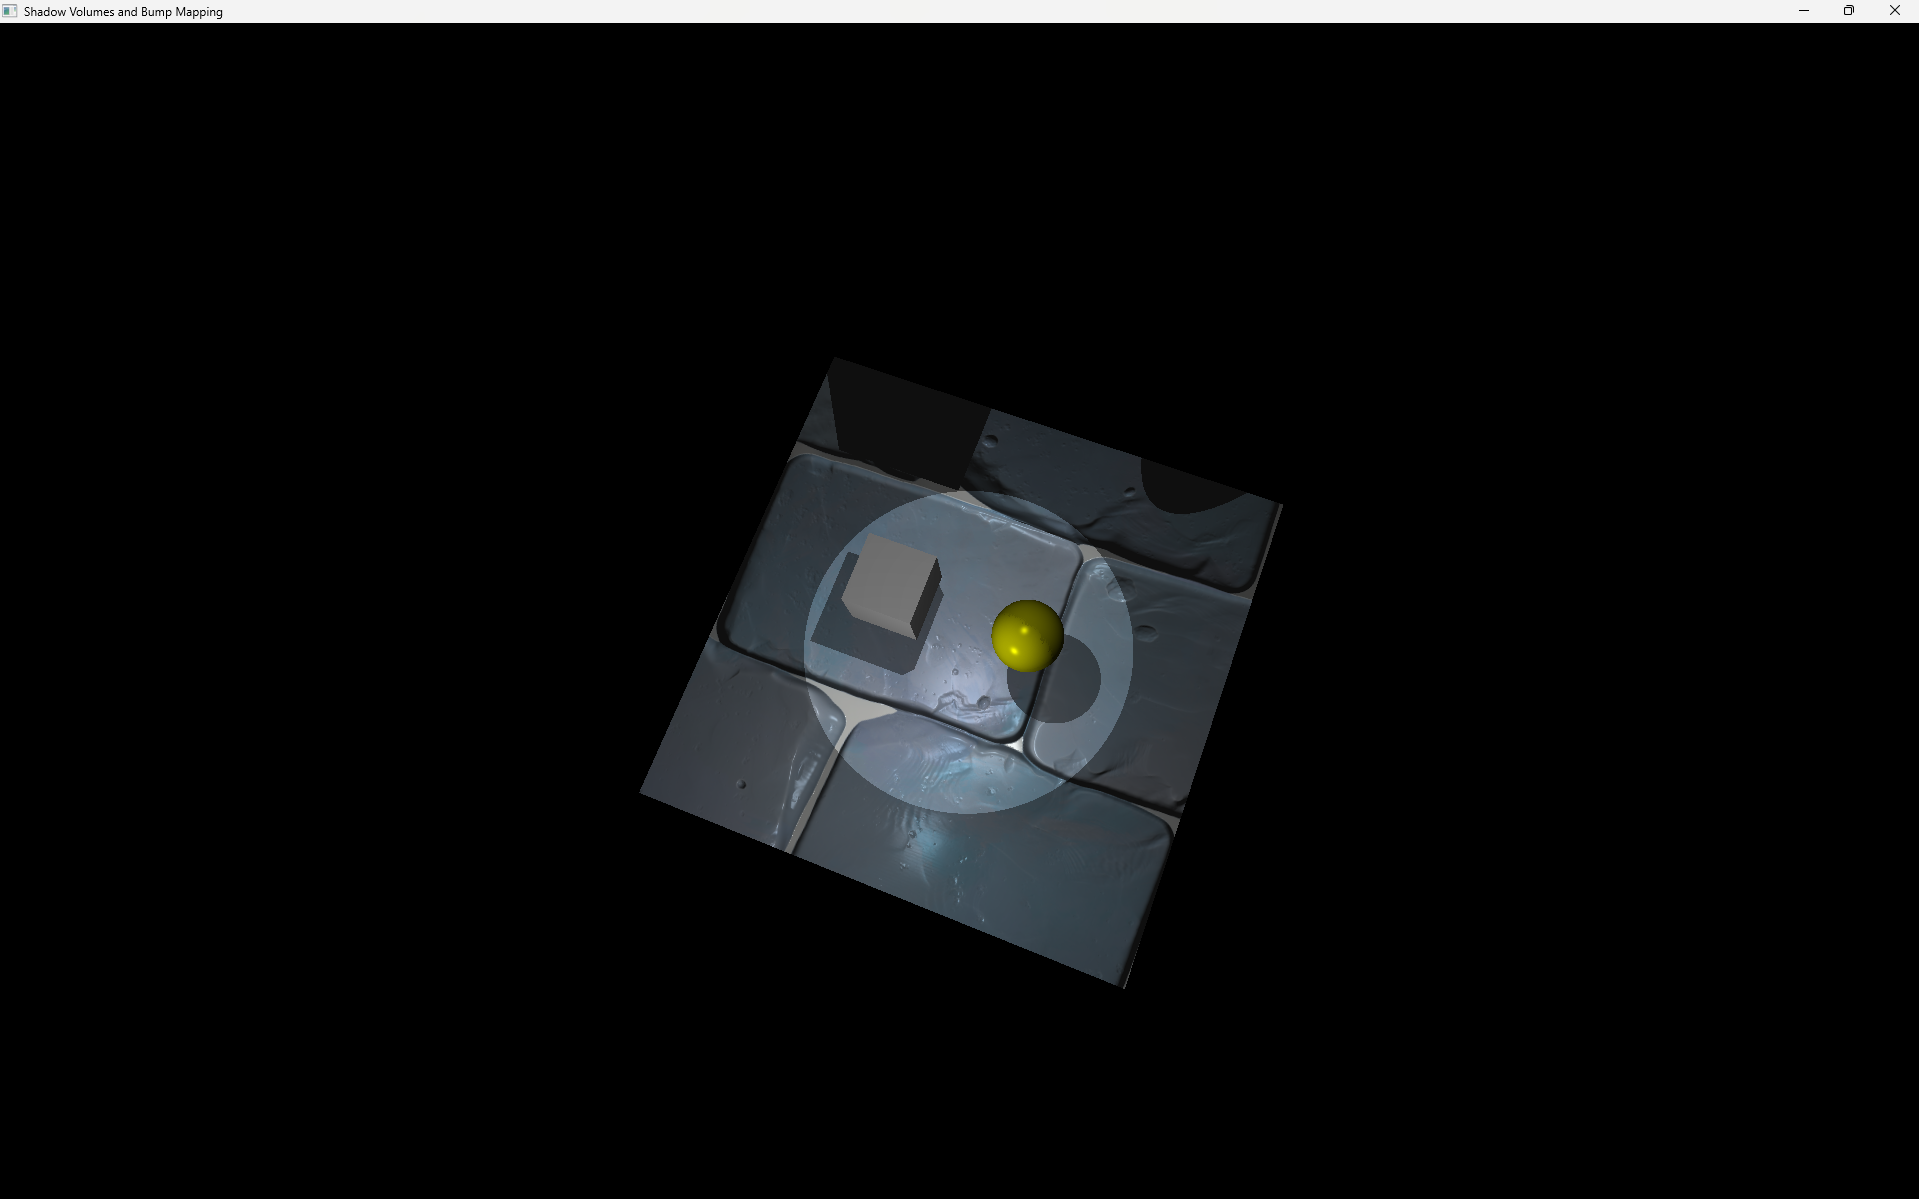 (A sample scene with 2 light sources and a few props. Note that each light has it’s own set of shadows.)
I ran into quite a few problems here initially. The original algorithm for shadow detection, called “Depth fail”, did not work and I had to switch to an alternate algorithm called “depth pass” that did the trick.
Another challenge was to integrate Shadow Volumes with Normal Mapping. Normal mapping (done through bump mapping) takes place in a co-ordinate space called the tangent-space. This is done so that the normals are independent of the orientation of the object. I initially ran into a few errors, but eventually figured my way out to produce the scene above.
With Shadow Volumes being done, it was time to move to the big guns.
Physically Based Rendering
As noted by Epic Games in the classic Unreal Engine 4 SIGGRAPH paper 8, Physically Based Rendering is a way of calculating the contribution of light to the color of a pixel in a way that mimics the real world. I’ll quickly explain a bit of theory, then move on to the implementation.
Theory of microfacets
PBR builds on the theory of microfacets, which states that any surface, on a microscopic level, can be defined by tiny little mirrors called microfacets. Depending on the roughness of the surface, the alignment of these mirrors can vary quite a lot.
Energy conservation
One of the most important aspects of PBR is the law of energy conservation. In real life, energy is neither created nor destroyed (well nuclear physics states otherwise, but hey, I’m not a nuclear scientist, and neither is this page! Getting back to the topic…) , and so, the summation of refracted and reflected light is always equal to the incident light.
This rendering technique uses something called a BRDF (Bidirectional Reflectance Distribution Function) to figure out how much of the incident light is reflected, and how much is refracted. Lets take a small step back and see what that means:
The render equation 9 is the best way of simulating the visuals of light. This is a super compute-heavy equation, so some very smart people came up with multiple approximations to this equation so that it can be computed in realtime. This approximated equation is called as the reflectance equation, and it looks somewhat like this:
\[L_o(p, \omega_o) = \int_\Omega \left(\kappa_d \frac{c}{\pi} + \frac{DFG}{4(\omega_o \cdot n)(\omega_i \cdot n)}\right) L_i(p, \omega_i) n \cdot \omega_i d\omega_i\]I’d be lying if I said I understood the thought process behind this equation, but I’ll try my best to explain what each term does.
- The left side of the equation (L) represents the color of a particular pixel
- The right side of the equation (with the integral) represents the summation of the effect of each light source on that pixel.
- Each light source’s contributes to the final color through a diffuse component and a specular component. This is given by the summation of 2 terms in the RHS (This is the BRDF!).
- Each light source’s contribution is also affected by the distance between the point and the light (inverse square law)
- Each light source’s contribution is also affected by the properties of the material such as metallicness, ambient occlusion, albedo, etc.
As for explanations on the individual terms themselves, a really good reference is LearnOpenGL’s PBR theory.10
With that being said, in my implementation, I used Lambertian diffuse, Cook-Torrance specular BRDF using Trowbridge-Reitz GGX for the Normal Distribution Function, Schlick-GGX for the Geometry function and Fresnel-Schlick for the Fresnel Equation, along with a constant-linear-quadratic attenuation (Beautifully visualized by Valve)11
The effect is very obvious, here is a scene with PBR:
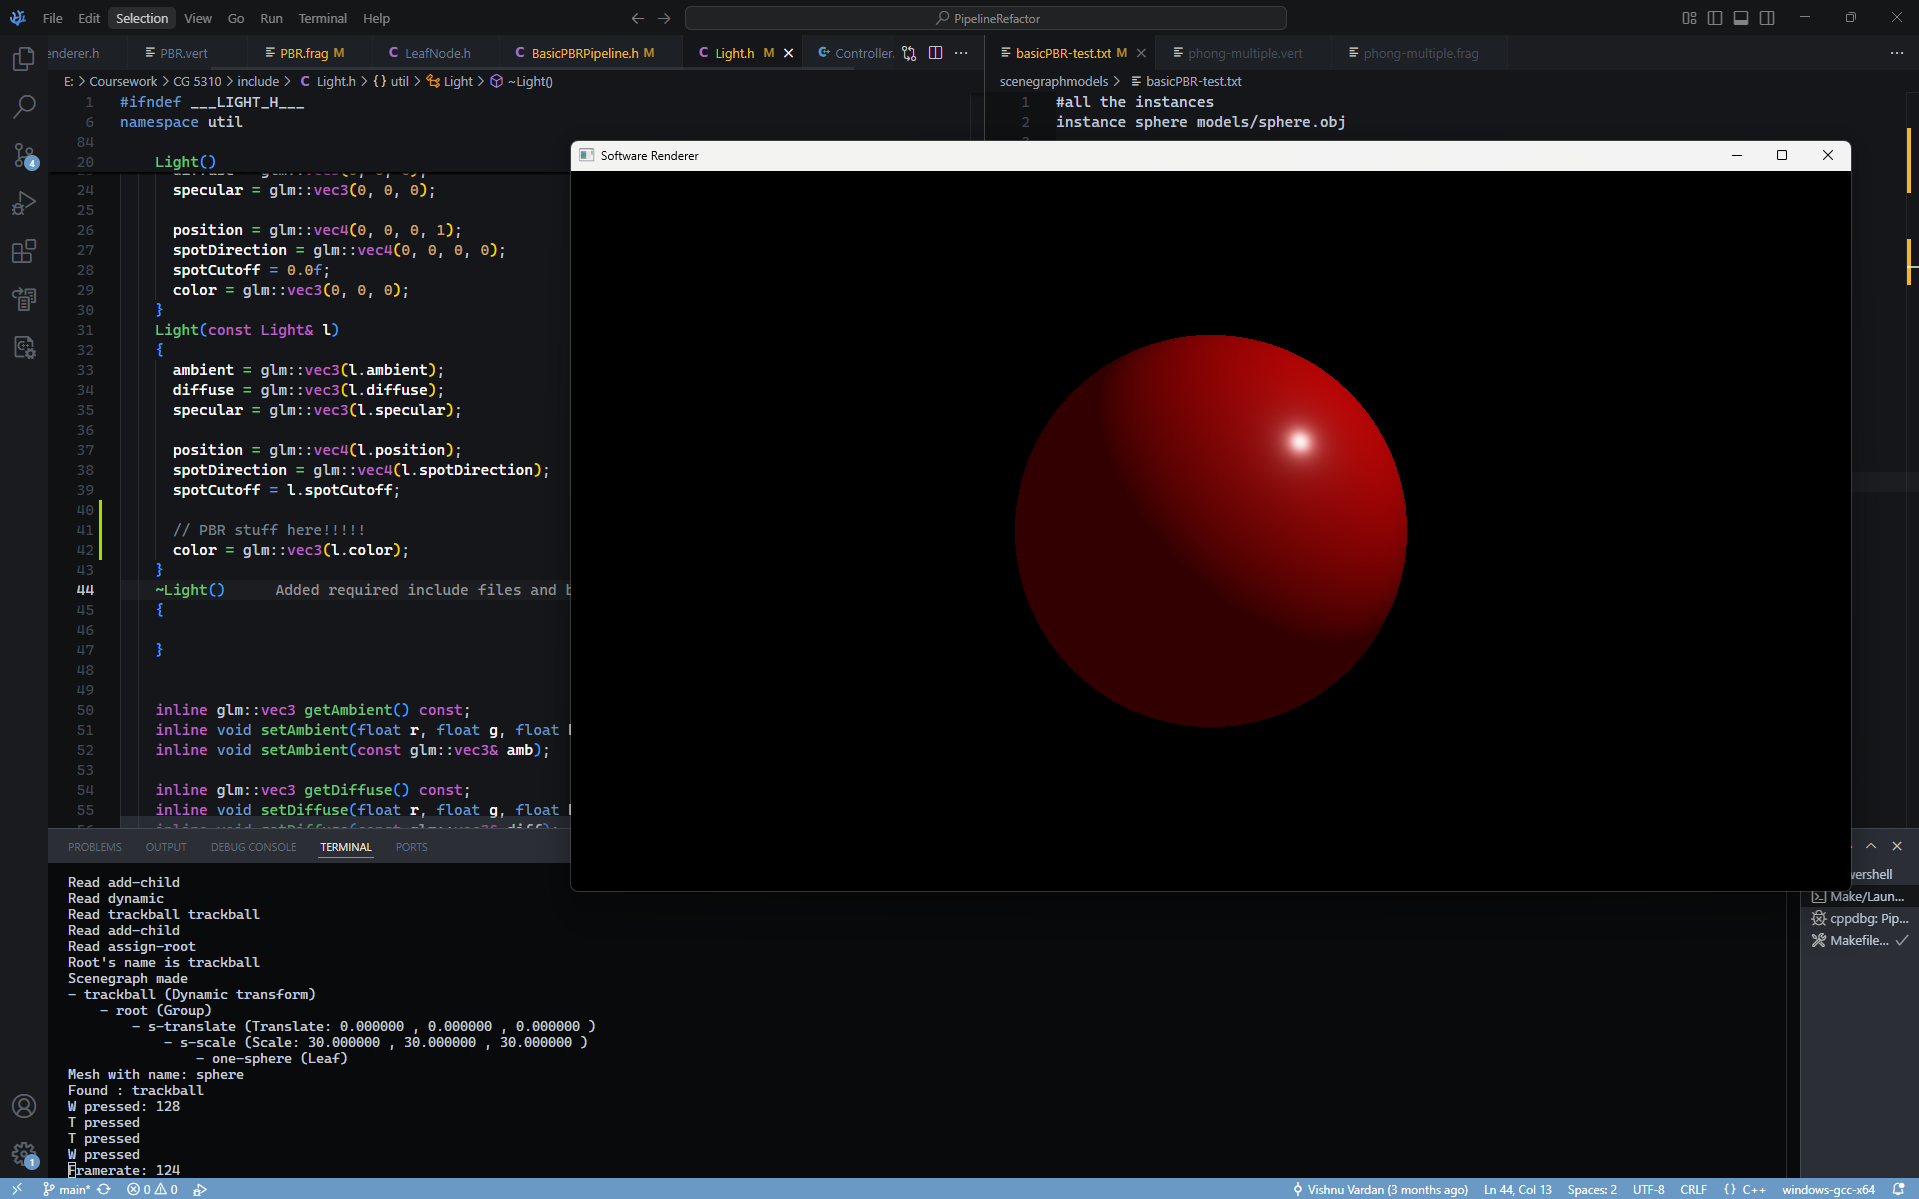
(The scene is a single sphere illuminated by a single light source kept at the top-right)
Once I had figured this out, it was only a matter of time before I used texture lookups to make use of normal, albedo, ambient occlusion and metallic maps. Once more, I had to do some tangent-space vodoo to get everything working, but hey, it was worth it!
Scaling codebase
I was at a point where I had two different set of rendering methods, one that used phong-shading with Shadow volumes, and another that used the PBR workflow but did not render shadows. I eventually had to merge these together, but my first attempt not pretty. The codebase was a convoluted mess of jumbled code, and there was no way to swap rendering methods.
Luckily, I was able to solicit the help of my mentor, and we decided on inserting a small abstraction between the scenegraph traversal code and the view (which set up the callbacks and had the rendering code so far). We named this a “pipeline” (Inspiration from Unity’s rendering pipelines)
The result: the main world traversal for rendering was decoupled from the view itself. This meant that I could swap out different rendering methods to see the visual differences for the same world. This was a huge timesaver. The scenegraph was already using a text parser to build the world, and with the pipeline changes, I could swap worlds, swap pipelines (and features) without needing to completely rework the codebase.
The codebase, in it’s current state, uses a Model-View-Controller design, where:
- the model stores the objects of the world, the hierarchial scenegraph and serves as a data vault as well.
- the view takes care of rendering pipelines, where you can swap rendering piplines, resize windows, and so on. This is where the majority of GLFW setup happens.
- the controller registers the callbacks, sets up different run-time functionalities such as rotation, movement and resetting changed transformations.
Some additional points to note:
- the hierarchial scenegraph uses a tree data structure, and subsequent traversal occurs using the visitor pattern.
- the textures can be loaded into the renderer using PPM images. PPM Images do not require any external libraries, so a simple ifstream with basic logic was sufficient to load these textures.
- there are different swappable pipelines, for example, there’s a PBR pipline that does not support spotlights, one that supports spotlights and shadow volumes, one that uses traditional phong-shading with shadow volumes and so on.
- there are multiple example scenes in the repo.
Current State
Once the pipeline changes were made, I could get back to working on merging the PBR workflow with the shadow volume pipeline. This was super easy, I just had to create a new pipline, pull the required shaders and merge the required renderers. Some tinkering in the view and tangent spaces, and some blending across different passes, and I was done:
(This scene has a spotlight and a point light, along with 3 different objects, each with their own set of textures.)
Future Plans and Finishing Thoughts
At this point, I’m gunning towards building a fully editable 3D world. But in order to do that, I’d have to build a small GUI where I can edit world-nodes, add components, import and export scenegraphs and so on. I already have a way to import a scenegraph (using a text file), so in the upcoming weeks, I will be focusing on building a Graphical UI with ImGUI, then writing exporters for the 3d world. Post that, it is very likely that I will run into performance issues, so I’ve been reading up on Clustered forward rendering for now. Maybe I’ll add some HDR, Anti-aliasing and tonemapping and I should be able to create something that is capable of rendering relatively large worlds at ease.
I hope you’ve had an interesting read. Thanks for stopping by!